MT5 Onboarding

Set Up MT5 Sync Step By Step

This page walks traders through the full JournalDock MT5 setup flow, from installing the connector and EA to creating the token and confirming synced trades on the profile.

MT5 Onboarding

Connect MT5 To JournalDock In A Few Clear Steps

This is the exact user flow from installer to live synced trades. No JSON editing, no Python setup, and no guesswork.

Step 1

Install the connector in a normal Windows flow

Download the installer, run it, and let JournalDock place the connector tools in the right location for you.

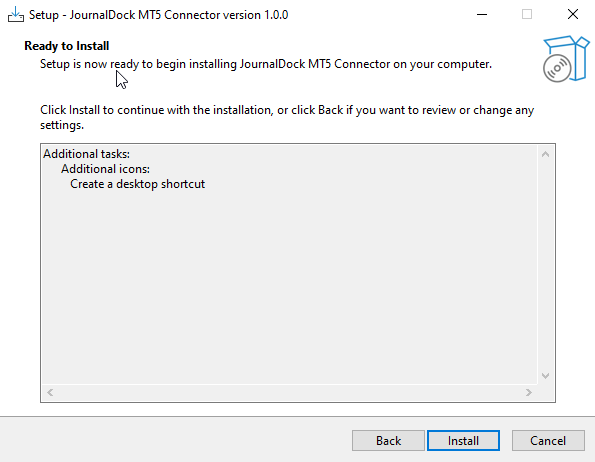
Open the installer file from your downloads or release folder.
Click through the setup wizard and finish the install.
Use the Start Menu or desktop shortcut to reopen the connector later.
Windows folder showing the JournalDock MT5 Connector installer file.
JournalDock MT5 Connector installer wizard ready to install.
Step 2

Turn on MT5 export and attach the JournalDock MT5 EA

MT5 needs to keep exporting your account and trade data so the connector can read it in the background.
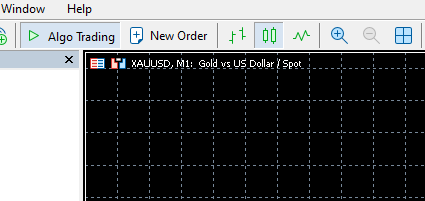
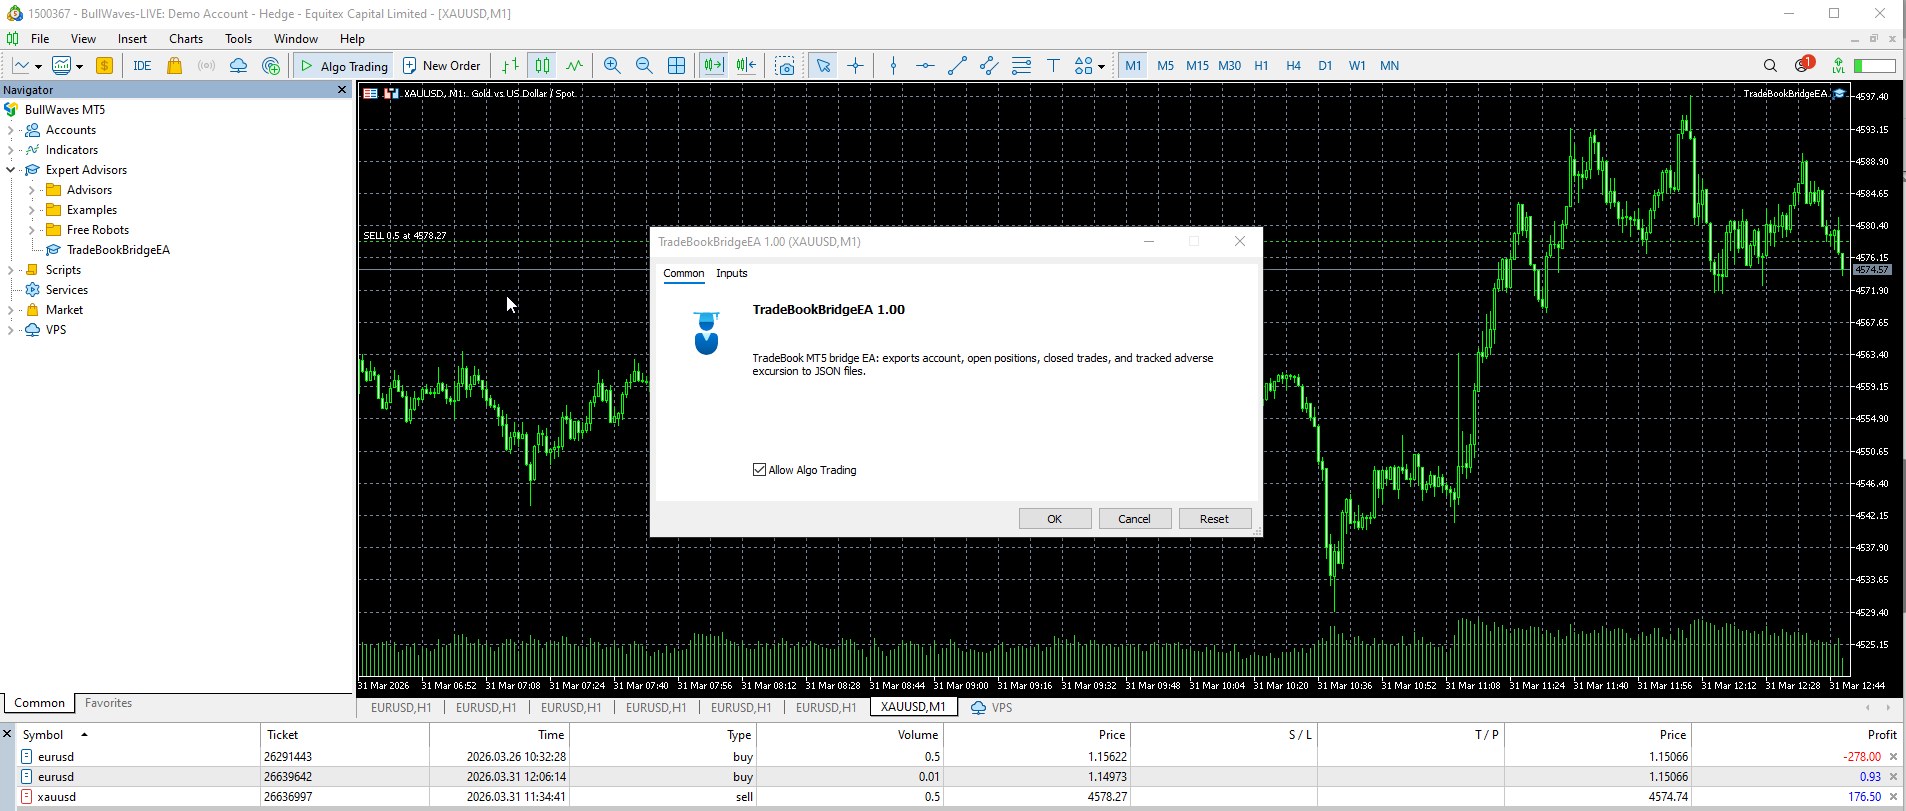
Enable Algo Trading in MT5.
Attach the JournalDock MT5 EA to a chart and leave it running.
Keep MT5 open while you want JournalDock to keep syncing.
MT5 toolbar with Algo Trading enabled.
MT5 chart with the JournalDock MT5 EA setup window open.
Step 3

Create your connector token inside JournalDock

Each device gets its own token. This lets your MT5 connector sync securely without using your website password.
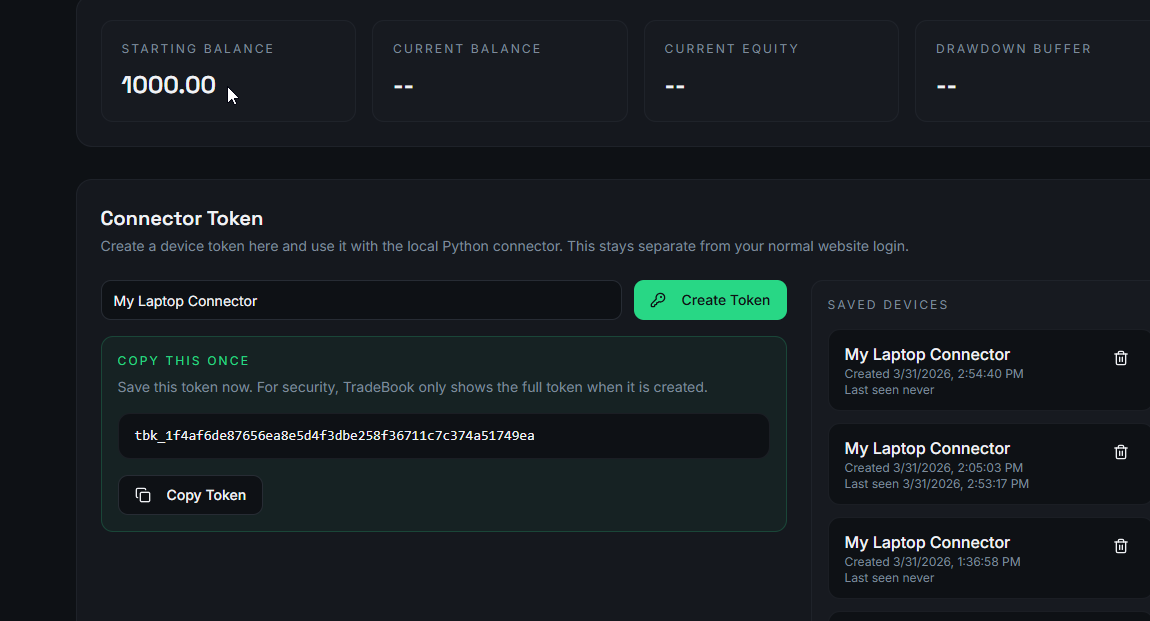
Open MT5 Pilot on the JournalDock website.
Create a new token for your laptop or PC.
Copy the token immediately when it appears.
JournalDock MT5 Pilot page showing a connector token and saved devices.
Step 4

Paste the token into the JournalDock connector app

The setup app is designed for non-technical users. Paste the token, click one button, and the sync service starts for you.
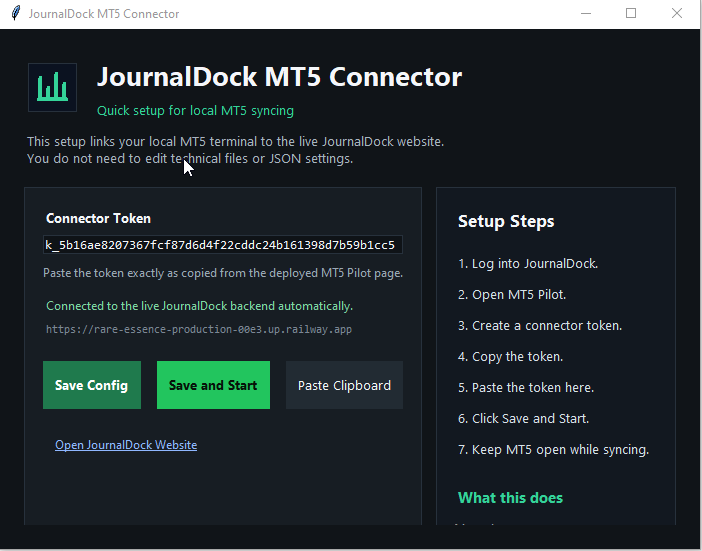
Open the installed JournalDock MT5 Connector app.
Paste the token into the Connector Token box.
Click Save and Start to begin background syncing.
JournalDock MT5 Connector desktop app with token input and Save and Start button.
Step 5

Watch trades appear in the connector trade feed

Once the background service is running, JournalDock starts receiving MT5 trades from your machine and listing them by connector device.
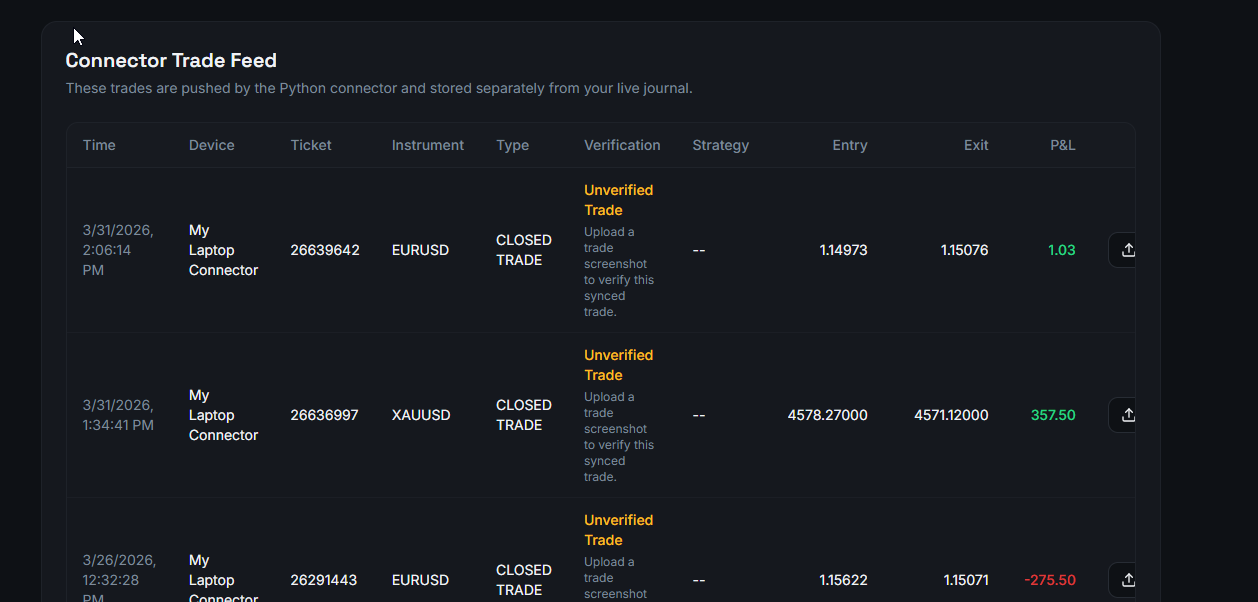
Your device name appears in the connector feed.
Closed trades show their entry, exit, and P&L.
Unsynced or stale devices are easy to spot from the same area.
JournalDock connector trade feed showing synced trades from a laptop connector.
Step 6

Confirm the trades reached your profile analytics

The final check is your profile itself. Synced MT5 trades should appear in your MT5 Sync Trades section and feed into your visible track record.
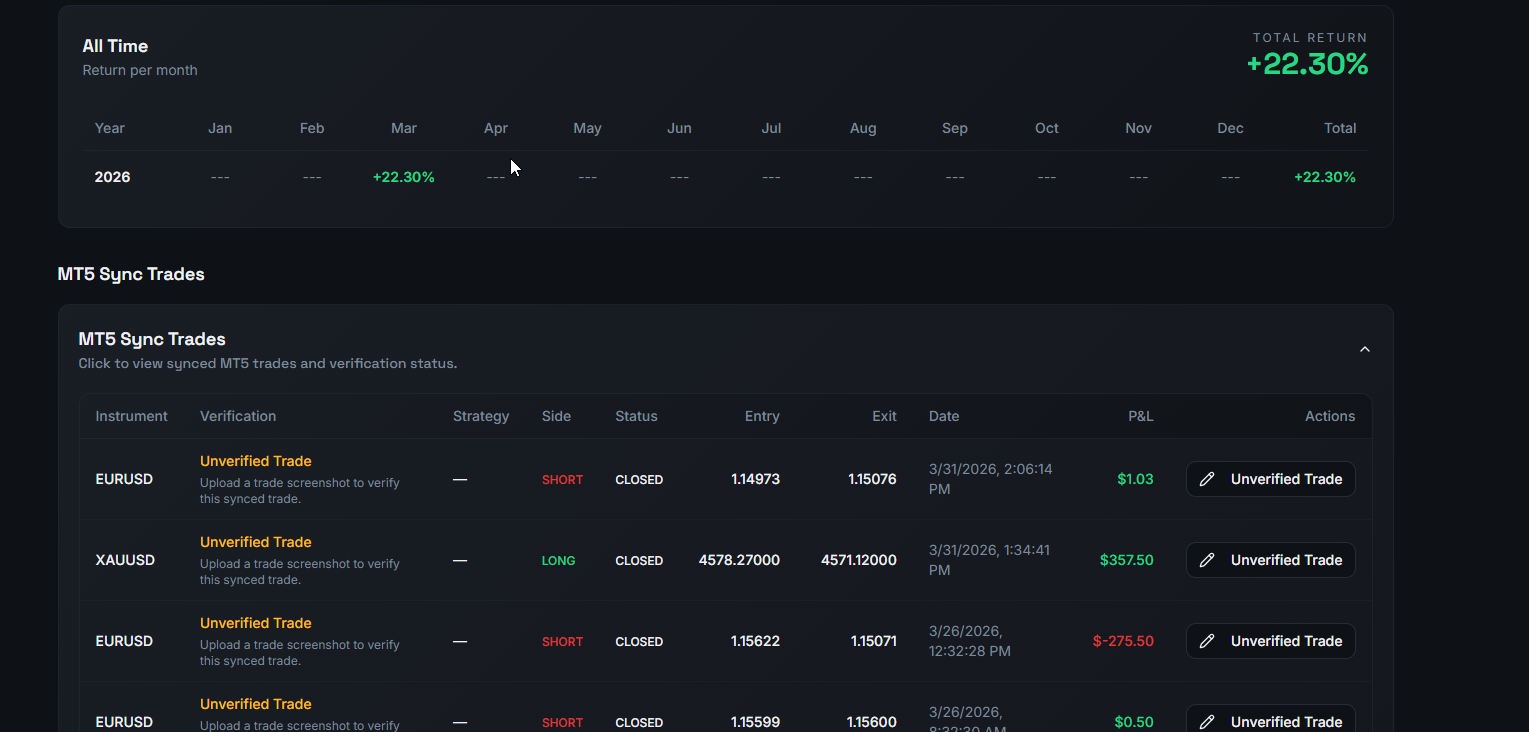
Open your public or private profile after syncing.
Check the MT5 Sync Trades table for the latest trades.
Confirm the performance sections are updating from that activity.
JournalDock profile page showing MT5 Sync Trades and all-time performance.
VPS Recommendation

Run MT5 on a VPS for better uptime

For more reliable MT5 syncing, traders may choose to run MT5 on a VPS. InterServer VPS plans start from $10 per month, with larger plans available for traders who want to run MT5 more comfortably.

This is an affiliate link. JournalDock may earn a commission if you purchase through it.
View VPS Options